Advent of Code with dbt + Postgres (part 1)
It’s that time of year again for the Advent of Code! This year instead of taking the time to learn a new language, e.g. last year I enjoyed learning some Scala, I thought I would try to see how far I would be able to go by just using plain ol’ SQL.
Well… almost plain ol’ SQL. Since dbt has become the norm for data transformation I was going to see how far along I would be able to go with dbt and SQL.
The Setup
Besides what dbt init gives us the only personal additions I included were a docker compose file to spin up a postgres instance to use (yes yes, probably overkill for this)
version: '3.1'

services:
  aoc_db:
    image: postgres
    restart: always
    environment:
      POSTGRES_USER: johnmav
      POSTGRES_PASSWORD: test
    ports:
      - "5432:5432"
and a small makefile so it was easy to setup/teardown the postgres instance
start-postgres:
	docker compose -f stack.yml up --remove-orphans
stop-postgres:
	docker compose -f stack.yml down
Other than that we have what dbt generates for us in a project.
Puzzle 1 Part A
Day 1 of the Advent of Code Parts A/B can be found here
dbt made it easy to load the puzzle inputs by simply copying the data into a .csv file and placing it into the data/ directory, then updating dbt_project.yml with
seeds:
  advent_of_code:
    +enabled: true
    +schema: seed_data
    puzzle_1:
      +column_types:
        depth: int
We can now run dbt seed in our terminal and voilá! Our puzzle input data is readily available in our postgres instance ready to be messed around with. We’ll note that this new seeded data is not in our public schema but in our public_seed_data schema
Part A of Day 1’s puzzle boiled down to map-reduce type puzzle where the mapping is simply looking at if the prior steps measurements was smaller or larger than the current step.
So to model out whether each step was an INCREASE or not from the last step we can create a query in our models/ directory which I called models/puzzle_1/puzzle_1_part_a.sql
SELECT
  ROW_NUMBER() OVER () AS step,
  depth,
  CASE
    WHEN depth - LAG(depth) OVER () > 0
    THEN TRUE
    ELSE FALSE
  END AS increased
FROM {{ ref('puzzle_1') }}
A pretty simple query, for each step in our depth we check if the prior step was smaller, if so then we have an increase! The dbt magic is mostly in the {{ ref('puzzle_1') }} which simply just uses the reference to our seeded table.
Once we have that created in our models we can run dbt run and we end up with a pretty simple table that indicates the step, the current depth, and whether or not we increased in depth.
Finally to get our solution I added a new .sql file to our analysis directory analysis/puzzle_1_part_a.sql
SELECT
  COUNT(
    CASE
      WHEN increased
      THEN step
      ELSE NULL
    END
  ) AS depth_increase_count
FROM {{ ref('puzzle_1_part_a') }}
Once we run dbt compile this converts our sql into a usable query that we could potentially use in a dashboarding tool, notebook, sql editor whatever. Our compiled sql looks like
SELECT
  COUNT(
    CASE
      WHEN increased
      THEN step
      ELSE NULL
    END
  ) AS depth_increase_count
FROM "postgres"."public"."puzzle_1_part_a"
Puzzle 1 Part B
For Part B we are doing a similar approach but doing the same operation across a sliding window. We can simply create depth groups using a CTE and then use roughly the same query as we used in part A on the depth groups.
WITH depth_groups AS (
  SELECT
    ROW_NUMBER() OVER () AS group_number,
    SUM(depth) OVER (ROWS BETWEEN CURRENT ROW AND 2 FOLLOWING) AS depth_sum
  FROM {{ ref('puzzle_1') }}
)

SELECT
  group_number,
  depth_sum,
  CASE
    WHEN depth_sum - LAG(depth_sum) OVER () > 0
    THEN TRUE
    ELSE FALSE
  END AS increased
FROM depth_groups
So this works. But the section outside of the CTE is pretty similar to what we did in Part A. In an effort to not repeat ourselves and utilize some more features of both Jinja and dbt we can create a reusable macro. In the macros/ directory lets create a puzzle_1_compute_increases.sql file that looks like
{% macro compute_increases(table_name, column_name) %}
  SELECT
    ROW_NUMBER() OVER () AS step,
    {{ column_name }},
    CASE
      WHEN {{ column_name }} - LAG({{ column_name }}) OVER () > 0
      THEN TRUE
      ELSE FALSE
    END AS increased
  FROM {{ table_name }}
{% endmacro %}
Simply our macro will take a table name and column name and perform the operations needed to compute whether a new depth is an increase over the last depth.
Now our solution to part A simply becomes:
{{ compute_increases(ref('puzzle_1'), 'depth') }}
and Part B becomes:
WITH depth_groups AS (
  SELECT
    SUM(depth) OVER (ROWS BETWEEN CURRENT ROW AND 2 FOLLOWING) AS depth_sum
  FROM {{ ref('puzzle_1') }}
)

{{ compute_increases('depth_groups', 'depth_sum') }}
Entirely too much for this simple problem? Probably! Could we name things better, always. But you can imagine as things get more complicated these reusable components of sql code can be quite handy to have in our toolbox.
»Data Pipelines With Python Generators
In my last post we learned a little bit about generators. In this post we’ll spend some time understanding generators and how they can be used to build out a simple data pipeline.
In case you forgot generators are iterators which utilize yield to output 1 result at a time minimizing the impact on memory. Generators become useful in handling large batches of data and performing distinct operations on each input.
Suppose we want to build a simple pipeline that took a set of first and last names structured like last name, first name and we wanted to structure them for insertion into a data warehouse.
Xi, Zhang
O'rourke, Lenny
Moore, Trevor
Rivani, Lisa
The first step in our pipeline can simply read in each row and yield the result.
def read_csv(file_path):
    with open(file_path) as csvfile:
        csv_reader = csv.reader(csvfile, delimiter=',')
        for rows in csv_reader:
            yield rows
This will read in each set of csv rows and output them as ['last name' , 'first name']. Now lets make each set of lists all lower case
def process_name(rows):
    for row in rows:
        yield map(str.lower, row)
Now we can run this pipeline and see the result
pipeline = process_name(read_csv('names.csv'))
for result in pipeline:
    print(result)
    ## We could also do our warehouse insert steps at this point in the pipeline.
Containers, Iterators, and Generators... Oh My!
One thing that I often find myself having to refresh my memory on is the nuances between the several ways python provides objects and classes for you to loop through. I’m talking about containers, iterators, and generators. If you’re like me and often find yourself trying to decide whether you should use yield or not hopefully this can help!
Containers are pretty much exactly what they sound like! They “contain” elements. Lists, Sets, Dictionaries, Tuples, Strings are all common containers that you’ve probably used without even realizing that these are all just similar data structures for storing information. Lists and Strings for instance behave very similarly. Suppose we have:
list_a = ['C','O','N','T','A','I','N','E','R']
string_a = 'CONTAINER'
On the surface yes these may seem quite different however the methods we can use to examine the contents of both list_a and string_a are quite the same.
>>> list_a[0]
'C'
>>> string_a[0]
'C'
>>> 'O' in string_a
True
>>> 'O' in list_a
True
>>>
Generally an object in python should be treated as a container if you can inspect whether a specific element is contained in that object.
Now what separates a container from an iterable? Well one thing that differentiates the two, is that an iteratable is not necessarily a data structure. Containers are stored in memory, where as iteratables are objects which return an iterator.
An iterator holds the state of where we are within an iterable.
Take for instance:
a = [x*x for x in (1,2,3,4)]
This produces the iterable [1,4,9,16] now suppose we wish to get the first element, then the second element, etc… One way we could do this is by explicitly using an iterators next method.
>>> b = iter(a)
>>> next(b)
1
>>> next(b)
4
>>> next(b)
9
>>> next(b)
16
This is more or less what happens when we use for...in i.e.
for i in a:
    print(i)

>>> 1
>>> 4
>>> 9
>>> 16
Iterators in turn are stateful helper objects that produce the next value in an iterable using the __next__() method. Iterators hold internal state and therefore know what the “next” value will be the next time you need it.
Now how do generators differ? Generators are actually quite like iterators but a little more nuanced and dare I say… fancy.
Generators much like iterators will produce values much like an iterator and not rely on them being explicitly stored in the memory of that object. Generators use yield to define generator functions but we can also create generators using generator expressions.
Remember that [x*x for x in (1,2,3,4)] we used above? That was a generator expression! Fun fact about Generators, all of them are iterators (but not the other way around).
Using yield we can do the same thing with a generator function:
>>> def my_generator(numbers):
...     for i in numbers:
...             yield i * i
...
>>> my_generator((1,2,3,4))
<generator object my_generator at 0x1030c3450>
>>> list(my_generator((1,2,3,4)))
[1, 4, 9, 16]
So why use generators vs iterators? Well they typically allow you to write streaming code, are more memory and CPU efficient, and often times they take less lines of code!
»My Terminal Setup
Most developers and engineers that I have met have dabbled in customizing their terminal and I’ve been caught between several, er, “spirited debates” on what customizations, plugins, tools, etc are better. This isn’t my attempt to convince you that my specific set up is the best. If anything this is just to help me remember how I like to setup my terminal whenever I get a new laptop 😅.
Before we get ahead of ourselves, I’ve tried a few other terminal tools like iTerm, Hyperterminal, etc… and while the feature sets of these are nice, I never find myself using them to their full extent. I’ve found the vanilla terminal app with zsh on my mac satisfies just about all my needs.
So let’s get into it! Here is my current setup!
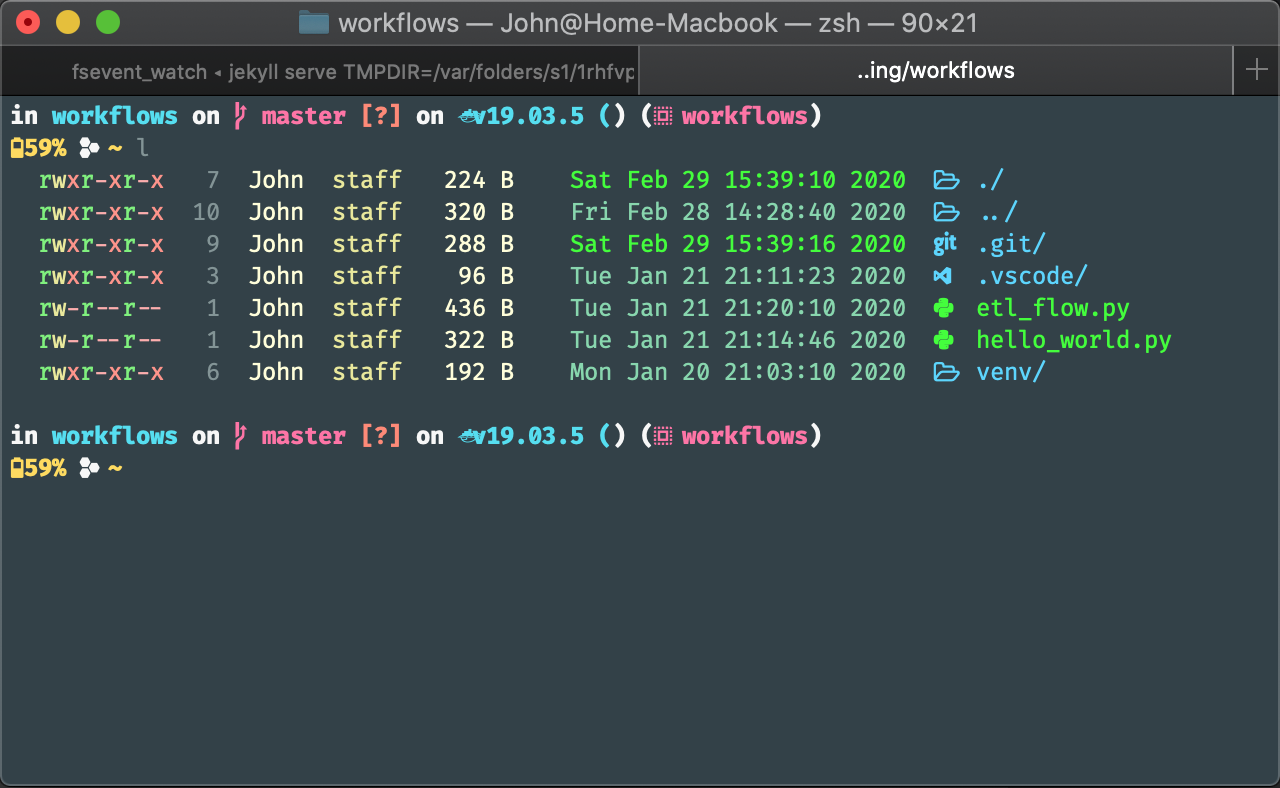
For customizing my terminal like this I first install Oh My ZSH. This is a great framework that provides a ton of community developed plugins and themes. Some themes are absolutely beautiful and some of the plugins are must haves if you work a lot with a specific tool.
Installing
$ sh -c "$(curl -fsSL https://raw.github.com/ohmyzsh/ohmyzsh/master/tools/install.sh)"
Currently I’m running the Spaceship Prompt and Nerd Fonts for all the icons.
It’s pretty easy to get these all set up
Install the Spaceship Prompt and symlink the theme
$ git clone https://github.com/denysdovhan/spaceship-prompt.git "$ZSH_CUSTOM/themes/spaceship-prompt"
$ ln -s "$ZSH_CUSTOM/themes/spaceship-prompt/spaceship.zsh-theme" "$ZSH_CUSTOM/themes/spaceship.zsh-theme"
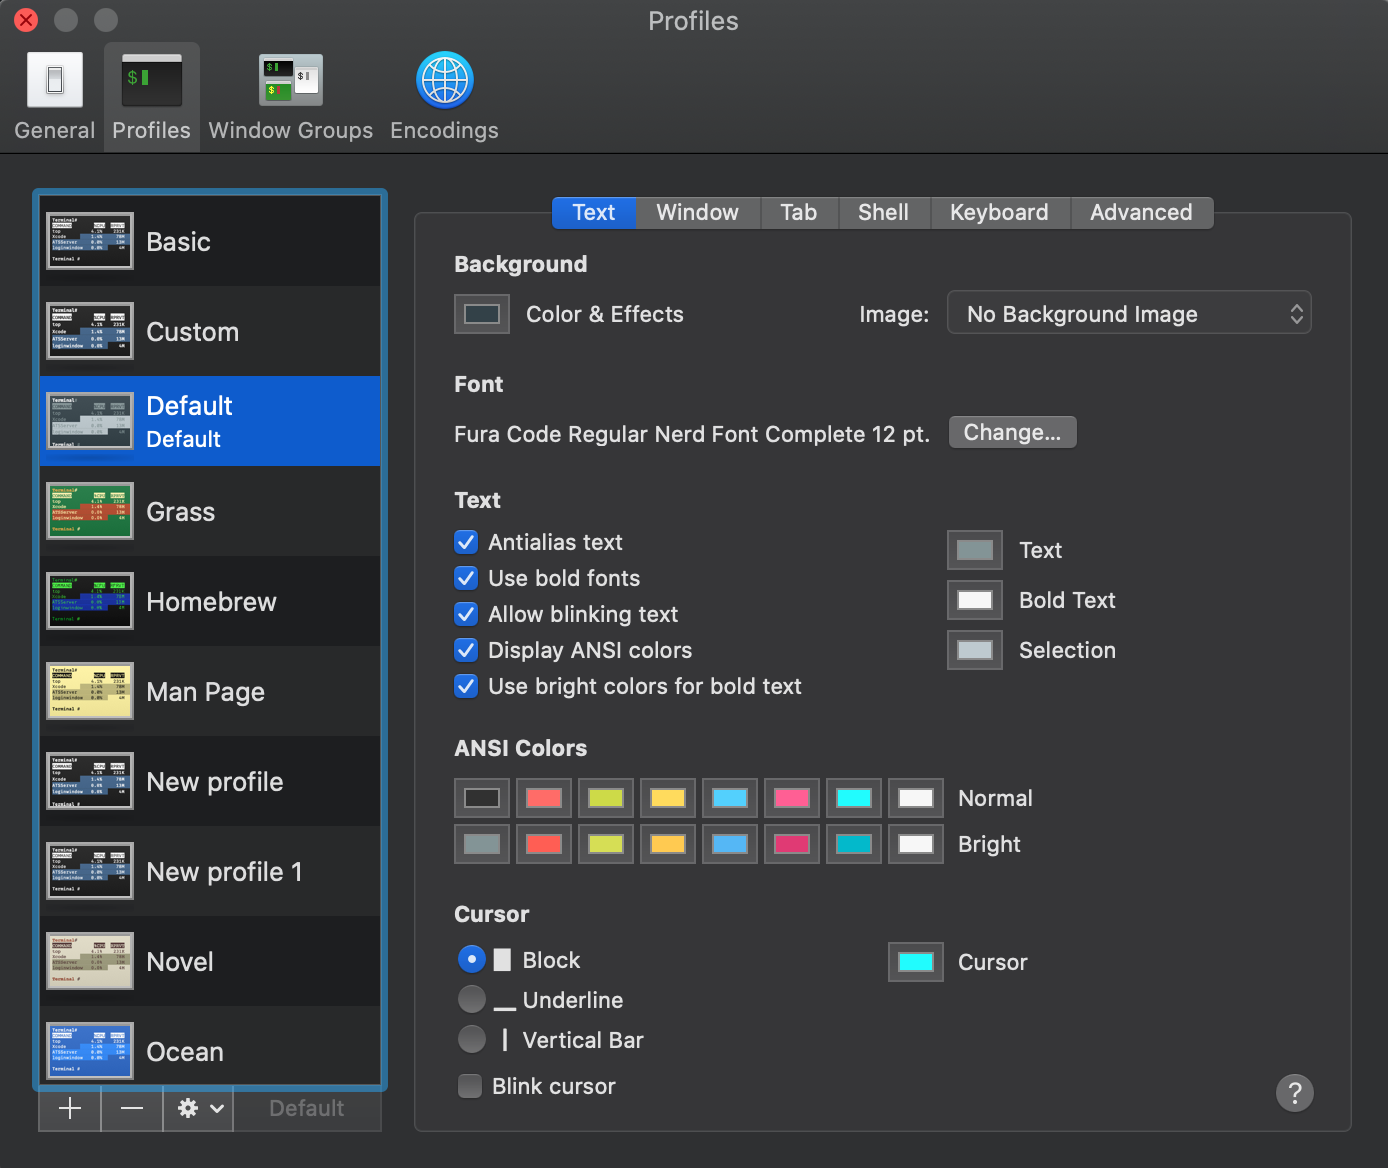
Then pick a nerd font to install, add it to your systems fontbook and in your terminal’s settings pick the new font as the default.
Next, we configure our ~/.zshrc file. Currently this is my setup
# If you come from bash you might have to change your $PATH.
export PATH=$HOME/bin:/usr/local/bin:$PATH

# Path to my oh-my-zsh installation.
export ZSH="/Users/John/.oh-my-zsh"

# Prompt
ZSH_THEME="spaceship"
SPACESHIP_PROMPT_ADD_NEWLINE="true"
SPACESHIP_CHAR_PREFIX='\ufbdf '
SPACESHIP_CHAR_PREFIX_COLOR='yellow'
SPACESHIP_CHAR_SUFFIX=(" ")
SPACESHIP_CHAR_COLOR_SUCCESS="yellow"
SPACESHIP_CHAR_SYMBOL='~'
SPACESHIP_PROMPT_DEFAULT_PREFIX="$USER"
SPACESHIP_PROMPT_FIRST_PREFIX_SHOW="true"
SPACESHIP_VENV_COLOR="magenta"
SPACESHIP_VENV_PREFIX="("
SPACESHIP_VENV_SUFFIX=")"
SPACESHIP_VENV_SYMBOL='\uf985'
SPACESHIP_USER_SHOW="true"
SPACESHIP_DOCKER_SYMBOL='\ue7b0'
SPACESHIP_DOCKER_VERBOSE='false'
SPACESHIP_BATTERY_SHOW='always'
SPACESHIP_BATTERY_SYMBOL_DISCHARGING='\uf57d'
SPACESHIP_BATTERY_SYMBOL_FULL='\uf583'
SPACESHIP_BATTERY_SYMBOL_CHARGING='\uf588'


## colorls configuration
source $(dirname $(gem which colorls))/tab_complete.sh

# Add wisely, as too many plugins slow down shell startup.
plugins=(git docker kubectl)

# Show Path
alias path='echo -e ${PATH//:/\\n}'

# Show available commands
alias ls="colorls"
alias la="cat ~/.zshrc | grep alias | cut -c 7-"
alias lf="cat ~/.zshrc | grep function | cut -c 7-"
function plugins() {
  echo howdoi \n task \n lolcat \n ag \n googler \n jrnl \n jira
}

# become root #
alias root='sudo -i'
alias su='sudo -i'

# Configuration
alias zshconfig="code ~/.zshrc"
alias ohmyzsh="code ~/.oh-my-zsh"
alias chrome="open -a \"Google Chrome\""
alias gitconfig="code ~/.gitconfig"

# Navigation
## get rid of command not found ##
alias cd..='cd ..'

## a quick way to get out of current directory ##
alias ..='cd ..'
alias ...='cd ../../../'
alias ....='cd ../../../../'
alias .....='cd ../../../../'
alias .4='cd ../../../../'
alias .5='cd ../../../../..'

# Setup quick local server in cwd
alias pythonserver="python -m SimpleHTTPServer"

# FileSearch
function f() { find . -iname "*$1*" ${@:2} }
function r() { grep "$1" ${@:2} -R . }

source $ZSH/oh-my-zsh.sh
There you have it! I’ll probably spend some time writing about some of the helper functions I’ve created here and some of the plugins I like to use. For now this is just an initial overview of my terminal setup! Look forward to future posts about my development environment.
»